Essential Tips for Landscaping and Tree Care Project Planning
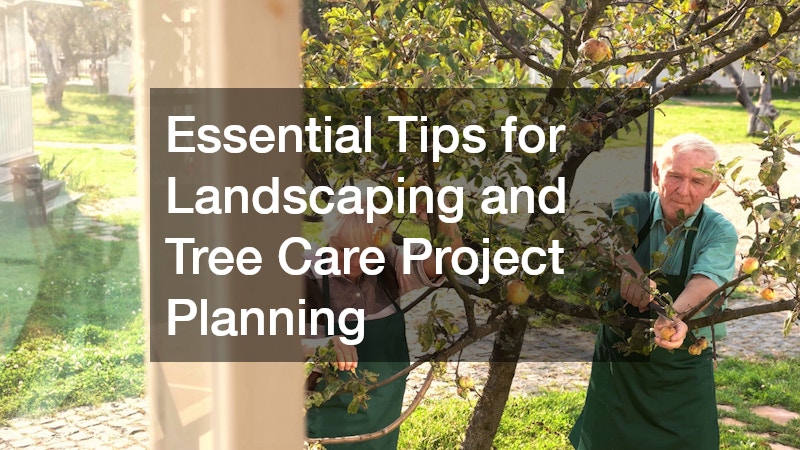

Stepping out your back door into an uninspiring, overgrown, or poorly utilized yard can be an incredibly overwhelming experience. When you are faced with patchy grass, haphazardly placed shrubs, and an overall lack of cohesion, it is difficult to even know where to begin. Many homeowners stare at their outdoor spaces and envision a tranquil oasis, a vibrant entertainment hub, or a safe, sprawling play area for their families. However, bridging the gap between that beautiful vision and the current reality requires far more than just a trip to the local garden center to buy a few flats of seasonal flowers.
Outdoor projects are notoriously complex. They often fail to thrive or end up going wildly over budget due to a lack of proper initial planning. A yard is not merely an extension of your living room; it is a living, breathing ecosystem subject to the whims of weather, soil chemistry, pests, and the passage of time. When you alter one element, it ripples through the rest of the environment.
This comprehensive guide is designed to demystify the entire process of transforming your property. By breaking down the fundamental principles of outdoor space management, you will learn exactly how to approach your property holistically. From the microscopic nutrients in your soil to the sprawling branches of your tallest oaks, we will walk through everything you need to know to plan a stunning, sustainable outdoor space that grows more beautiful with each passing season.
Map Out Your Master Plan Before Moving Dirt

Evaluate Your Microclimates and Soil Health First
The most common mistake homeowners make is buying plants based purely on aesthetics without considering the biological realities of their property. Every yard is comprised of multiple microclimates—small areas where the temperature, moisture, and sunlight differ significantly from the surrounding environment. Before making a single purchase for your landscape design, you must spend time observing these patterns.
Track the sunlight throughout the day. A spot that receives gentle morning light might be plunged into deep, cool shade by the afternoon, or conversely, a seemingly protected corner might bake in the harsh afternoon sun. You need to map these zones into three distinct categories: full sun (six or more hours of direct light), partial shade (three to six hours), and full shade (less than three hours).
Equally important to sunlight is what lies beneath the surface. Soil health dictates the success of every living thing in your yard.
-
Conduct a DIY soil test: Purchase a basic kit to check your soil’s pH levels. Most plants prefer a neutral pH (around 6.5 to 7.0), but some, like azaleas and blueberries, thrive in acidic soil.
-
Determine soil texture: Squeeze a handful of moist soil. If it clumps tightly and feels slick, you have heavy clay, which drains poorly. If it falls apart immediately and feels gritty, you have sandy soil, which drains too fast and loses nutrients.
-
Amend accordingly: Based on your findings, you can work organic matter, compost, or specific fertilizers into the earth long before planting begins.
Define Distinct Functional Zones
Once you understand the environmental constraints of your property, you can begin organizing the space based on how you actually want to live in it. Treating your yard as a single, uniform block is a missed opportunity. Instead, think of your outdoor space as a house without a roof, divided into distinct “rooms” or functional zones.
-
The Entertainment Zone: This area typically houses patios, decks, fire pits, and outdoor kitchens. It requires durable surfaces and should ideally be located close to the house for easy access to food and drinks.
-
The Play Zone: Whether for children or pets, this area needs resilient ground cover and should be situated where it is easily visible from indoors.
-
The Sanctuary Zone: A quiet corner for reading or relaxing, perhaps featuring a water feature, fragrant blooms, and a comfortable bench tucked away from the main activity areas.
Plotting these zones on a piece of graph paper can save you immense amounts of time and frustration. By sketching things to scale, you can see how the different areas interact. If the transition between these functional rooms feels awkward or you are struggling to manage challenging elevation changes, this is the stage where consulting with professional landscape designers can be incredibly valuable. They possess the spatial awareness to create a cohesive, logical flow that maximizes every square inch of your property.
Establish a Realistic Budget for Hardscapes and Softscapes

Calculate the 80/20 Rule of Outdoor Spending
When planning an outdoor overhaul, sticker shock is a very real phenomenon. Homeowners frequently underestimate the cost of materials and labor, particularly when it comes to the non-living elements of the yard. A helpful guideline to keep in mind is the 80/20 rule of outdoor spending: in most major renovations, roughly eighty percent of the budget will be consumed by hardscaping, while only twenty percent will go toward softscaping (the plants, mulch, and turf).
Hardscaping includes patios, walkways, retaining walls, pergolas, and outdoor kitchens. These elements form the permanent skeleton of your yard.
-
Prioritize durability: It is crucial to source landscape materials that can withstand your specific local weather conditions—from freezing winter thaws to blistering summer heat—without cracking or fading prematurely.
-
Compare material costs: Natural stone flagstone is stunning but expensive in both material and installation costs. Stamped concrete or high-quality manufactured pavers can offer a similar aesthetic at a more manageable price point.
-
Phase your projects: If your budget is tight, do not compromise on the quality of your hardscape materials. Instead, build the patio this year, and wait until next year to install the surrounding garden beds.
Plan for Hidden Installation Costs
The visible materials are only part of the financial equation. The most budget-busting aspects of outdoor renovations are often the things you never actually see once the project is finished. Before a single paver is laid, the ground must be prepped, and this phase is fraught with hidden expenses.
-
Grading and leveling: If your yard slopes toward your house, you must invest in proper grading to direct water away from your foundation. Failing to do so will result in catastrophic flooding issues.
-
Drainage correction: You may need to install French drains, catch basins, or dry creek beds to manage heavy rainfall and prevent your new lawn from becoming a swamp.
-
Excavation and disposal: Digging out a new patio generates literal tons of dirt and rock. Hauling this material away to a specialized facility costs money in labor and dumping fees.
When you are gathering quotes and estimating your budget, do not just accept a single number. You must have detailed conversations with various landscaping contractors to ensure they have accounted for these hidden, below-ground necessities. Ask them directly how they plan to handle water runoff and soil removal to ensure there are no surprise fees added to your final bill.
Build a Long-Term Strategy for Ground Cover Health

Automate Your Irrigation and Aeration Schedules
A lush, vibrant lawn and thriving garden beds require consistent, deep watering, but human error is the number one cause of plant failure. We forget to water during dry spells, or worse, we overwater out of panic, drowning roots and inviting fungal diseases. Automating your irrigation is one of the smartest investments you can make for the long-term health of your ground cover.
-
Install drip irrigation in beds: Drip lines deliver water directly to the base of the plants, minimizing evaporation and keeping the leaves dry (which prevents powdery mildew).
-
Utilize smart sprinkler controllers: Modern controllers connect to your local Wi-Fi and adjust watering schedules automatically based on real-time weather forecasts, skipping cycles if rain is expected.
-
Schedule core aeration: Grass roots need oxygen to survive. Over time, foot traffic and rainfall compact the soil, suffocating the turf. You should schedule an annual core aeration—a process that pulls small plugs of dirt out of the lawn—to relieve this compaction, allowing water, nutrients, and air to reach deep into the root zone.
Determine Your Personal Maintenance Threshold
Before you plant a sprawling, intricate English garden or lay down a half-acre of high-maintenance Kentucky Bluegrass, you need to have a brutally honest conversation with yourself about your weekend availability. Maintaining a pristine yard is a part-time job.
-
Assess the weekly time commitment: Calculate how many hours a week you are genuinely willing to dedicate to mowing, edging, pulling weeds, deadheading flowers, and applying fertilizers. If the answer is “very few,” you must design a low-maintenance yard focused on native perennials, extensive mulching, and drought-tolerant ground covers like creeping thyme or clover.
-
Weigh the DIY vs. Professional cost: If you desire a manicured look but lack the time or physical energy to execute it, you need to budget for ongoing help. Calculate the cost of your time versus establishing a seasonal maintenance contract with reliable lawn care companies. These professionals have the commercial-grade equipment and specialized knowledge to keep the foundation of your yard pristine, freeing you up to actually enjoy the space rather than constantly working in it.
Implement a Routine Inspection and Pruning Schedule for Canopy Health
Identify Signs of Disease and Infestation Early
While we spend a lot of time looking down at our grass and garden beds, we often forget to look up. The mature timber on your property represents decades of growth and adds immense shade, beauty, and property value to your home. However, these massive living organisms are susceptible to a host of diseases and pests. Catching the warning signs early is the key to saving them.
Walk your property regularly and look closely at the trunks, branches, and leaves of your mature timber.
-
Look for fungal growth: Mushrooms or conchs growing at the base of the trunk or out of the bark are a major red flag, indicating internal rot and decay.
-
Check for bark abnormalities: Peeling bark, deep vertical cracks, or sap oozing from the trunk (often called bleeding cankers) suggest the plant is under severe stress or fighting an infection.
-
Monitor the canopy: If a section of the canopy fails to leaf out in the spring, or if the leaves turn brown and drop prematurely in the summer, you have a problem.
-
Spot insect damage: Look for tiny exit holes in the bark, extensive sawdust at the base of the trunk, or visible pest infestations on the undersides of the leaves.
If you spot any of these symptoms, do not attempt to self-diagnose using internet forums. Scheduling routine wellness checks with certified arborist tree services is a proactive step that can identify and treat an infestation—like the destructive Emerald Ash Borer or oak wilt—long before the damage becomes irreversible, potentially saving a majestic, century-old shade provider from an untimely demise.
Schedule Dormant Pruning for Maximum Growth
Proper pruning is not just about making a plant look tidy; it is a critical horticultural practice that dictates structural integrity, air circulation, and future growth patterns. However, timing is everything. Pruning at the wrong time of year can send a plant into shock, expose it to disease, or stimulate tender new growth right before a killing frost.
-
The power of dormant pruning: For most deciduous species, the absolute best time to prune is late winter or very early spring, while the plant is still fully dormant. Without leaves in the way, the structural framework of the branches is completely visible, making it easier to identify crossing branches or weak unions. Furthermore, dormant pruning minimizes sap loss and allows the pruning wounds to heal quickly as soon as the spring growth push begins.
-
Avoid over-pruning: Removing too much foliage at once starves the root system. You should generally never remove more than 25 percent of a canopy in a single season.
-
Say no to topping: “Topping”—the indiscriminate hacking off of the upper canopy—is a harmful, outdated practice that ruins the natural shape of the plant and creates weak, hazardous regrowth.
For anything beyond minor shaping with hand shears, complex canopy reductions, structural thinning, and crown raising are highly technical tasks. These procedures require a deep understanding of plant biology and weight distribution, which is why they are best left to a specialized tree trimming company that employs trained professionals who know exactly where to make the cuts without causing permanent damage.
Safely Address Dead, Diseased, or Structurally Compromised Timber
Recognize the Warning Signs of a Falling Hazard
Despite our best efforts with pruning and disease management, the reality of nature is that eventually, things die. When a massive, heavy organism dies while still standing vertically in your yard, it transitions from a beautiful asset into a severe liability. Identifying a structural hazard before a major storm hits is critical for the safety of your home and your family.
-
Inspect the root collar: If you see the soil heaving up on one side of the trunk, or if the plant has recently developed a severe, unnatural lean, the root system has likely failed. It is in imminent danger of toppling.
-
Look for V-crotches: Branches that connect to the trunk in a sharp “V” shape are structurally weak compared to branches that form a wider “U” shape. As these V-crotches grow heavier over the years, they are highly susceptible to splitting straight down the middle during high winds or heavy ice accumulation.
-
Identify major deadwood: Large, leafless branches suspended in the upper canopy are referred to as “widow-makers” in the logging industry for a reason. They can snap and fall at any moment without warning.
When you identify these hazards, you must resist the urge to buy a chainsaw and handle it yourself. The extreme physical danger, the unpredictable physics of falling wood, and the immense liability of DIY extraction cannot be overstated. Utilizing professional tree removal services is an absolute necessity for dealing with anything taller than a one-story roof or thicker than your thigh. The cost of hiring a professional is a fraction of the cost of rebuilding a crushed roof or paying medical bills from a catastrophic accident.
Navigate Local Permit Requirements and Property Lines
Before the chainsaws start humming, there is a bureaucratic hurdle you must clear. You cannot simply chop down anything on your property just because you want to. Municipalities have strict regulations designed to protect the urban canopy and maintain the environmental health of the community.
-
Check your local ordinances: Many cities, townships, and homeowners associations (HOAs) require you to apply for and obtain a specific permit before cutting down certain species (like protected Heritage Oaks) or any trunk that exceeds a specific diameter. Failing to secure these permits can result in massive, thousands-of-dollar fines.
-
Determine property boundaries: If a hazardous, rotting trunk sits right on the edge of your property, you need to pull your plot plan and determine exactly who owns it. If the trunk straddles the property line, you share ownership and responsibility with your neighbor.
-
Communicate clearly: Never alter or cut down shared timber without having a documented, amicable conversation with your neighbors first. Coordinate the logistics, agree on how the financial burden will be split, and get everything in writing before calling for local tree removal to avoid bitter legal disputes and ruined neighborly relationships.
Conduct Rigorous Background Checks Before Delegating Heavy Labor
Verify Insurance, Bonding, and Arborist Certifications
When you hire professionals to execute heavy outdoor labor—whether they are moving tons of retaining wall block or dropping massive, multi-ton logs near your fragile windows—the stakes are incredibly high. The difference between a smooth project and a stressful nightmare often comes down to the vetting process you conduct before signing a contract.
You must act as a diligent project manager and verify the credentials of anyone you allow to operate heavy machinery on your property.
-
Demand proof of Liability Insurance: This insurance protects your property. If a contractor drops a branch through your roof or drives a skid steer into your fence, their liability insurance pays for the repairs. Do not just take their word for it; ask to see the certificate of insurance and ensure it is current.
-
Verify Worker’s Compensation Insurance: This is even more critical. If a worker falls off a ladder or is injured by a chainsaw while on your property, and the employer does not have worker’s compensation, you (and your homeowner’s insurance) can be sued for their medical bills and lost wages.
-
Look for ISA Certification: The International Society of Arboriculture (ISA) issues credentials to professionals who have passed rigorous exams regarding the science and biology of plant care. Checking these credentials is non-negotiable when hiring tree companies for heavy-duty canopy projects or hazard mitigation, as it ensures you are hiring educated experts, not just individuals with a truck and a saw.
Request and Review Recent Portfolios and References
Paperwork and insurance prove that a contractor is operating a legal, responsible business, but they do not necessarily prove that they are artists or craftsmen. To ensure the final result matches the vision you hold in your head, you must review their past work.
-
Ask for highly specific references: Do not just ask for general references. If you are planning to install an intricate natural stone fire feature, ask to speak to three past clients who had natural stone fire features installed. If you need a massive crane to hoist wood over your house, ask to speak to homeowners who have undergone that specific, stressful procedure.
-
Examine the portfolio critically: Look closely at the photos they provide. Are the paving lines straight? Do the retaining walls look level? Do the pruned canopies look balanced and natural, or do they look hacked and unnatural?
-
Visit a job site: If possible, ask if you can drive by a current or recently completed job site. Seeing the work in person, observing how tidy they keep the site, and seeing how the materials hold up in the real world will give you the ultimate peace of mind before you hand over your hard-earned deposit.
Conclusion
Transforming your yard from a chaotic, underutilized patch of dirt into a harmonious, functional, and deeply beautiful outdoor sanctuary is one of the most rewarding endeavors you can undertake as a homeowner. While the sheer number of variables—from soil pH and drainage to structural pruning and zoning laws—can seem daunting at first glance, the secret to success lies entirely in the preparation. By shifting your perspective and viewing your property as a complex, interconnected living system, you empower yourself to make intelligent, long-lasting decisions.
Remember that successful outdoor projects are never rushed. They require a realistic assessment of your budget, an honest evaluation of your personal time and energy, and the wisdom to know when a task is too dangerous or technical to handle on your own. Investing the time now to properly evaluate your microclimates, sketch out functional zones, and meticulously vet the professionals you invite onto your property will pay dividends for decades to come.
You do not have to have everything figured out today. The best way to overcome the overwhelm is simply to start. Take a walk around your property this evening. Sketch out a rough map of the sunny and shady areas on a piece of scrap paper. Make a list of the dead branches you need to address, or start dreaming about where that new patio might go. The journey to your perfect outdoor space begins with that first, deliberate step outside your door.